Archive | Cooking RSS feed for this section

Saturday Sweets: Strawberry Chocolate Meringue Torte

6 Aug

I’ve been a little heavy on the recipes lately, but I have quite a backlog to get through of things I feel I just HAVE to tell you about!  And I’ve missed TWO weeks of Saturday Sweets installments and want to make it up to you.

Also, my family left today to go back to the faraway land of O-Ville, Ontario, so I don’t have the cheeriest of stories to share with you.

Unless you’re interested in the fact that we bought a house?

Well, technically that is largely untrue.  My in-laws bought the house, really, but we have our small share which allows us to live in a rather palatially large share.  Sounds fair, right?  For the first time I actually get to put my Interior Decorating diploma to good use on a home I can actually make decisions about!  I don’t have to confirm with a landlord if I want to paint a wall (which I ALWAYS do), I don’t have to hope no one will notice we screwed a planter box onto the side of the house, I don’t have to pay someone else’s mortgage for them, I don’t have to cram 4 people’s lives into less than 900 square feet…

On the other hand, I do have to care if my appliances break down or my roof leaks. I do have to clean like I might be there in two years facing the same (no doubt morphed) dirt if I don’t deal with it now.  I do have to commit to staying in one place for a reasonable amount of time.

I figure I can handle one big commitment per 5 year span, and between getting married and having 2 children over the past 5 odd years I’m just hoping the time frames don’t overlap anywhere, prompting a return to my post-wedding sleeptalking and day visions which made Carl (and my mother) question my sanity.

(Now you are probably questioning my sanity.  Don’t worry, I’m quite harmless.)

I don’t even know where to begin – probably largely due to the fact that my budget is about $12.  If I had unlimited money I think I know exactly where I would start – hire an interior decorator 😉  But seriously, we’re very excited about it, as it will give the kids lots of room to play, both inside and out, and with all that kitchen space just THINK how many recipes I can test and create!

In the meantime, before said O-Ville family left, I made this delicious gluten-free dessert for us all!

I inherited a daunting stack of old Cooking Light magazines from my aunt, via my mom, and thoroughly enjoyed going through each one and ripping out recipes to try at a later date.  As I work my way through them, I have to say I have yet to be disappointed by one, and since the magazine is called Cooking Light I feel like they must be healthy…and actually, a serving (an eighth) of this dessert comes in at less than 200 calories, according to the nutritional info provided in the magazine.  This torte was a big hit with adults and kids alike; I could easily have made two as it’s really light and fresh and inherently eatable.  And we all like our dessert.

My meringue could’ve used an extra 15 minutes since it was a muggy day, making it a bit harder to remove it from the parchment paper, but it didn’t affect the overall taste at all.  I’d actually never made meringue till recently and then I’ve made it several times in the last month after realizing how easy it is, so if you haven’t tried it this is a great recipe to start with!  If you’ve had pavlova, this is basically fruit pavlova in cake form, which looks impressive, even if it is hopelessly, deliciously messy to serve.  I wish I could’ve taken a picture of that for you but since this dessert traveled, and I have yet to become crazy/patient/bold enough to photograph food at other people’s homes (it’ll come), you can click here to see what the inside looks like.  Honestly, mine didn’t look nearly that perfect anyway.  Nobody complained.

Aside from making the meringue this is actually a very low-effort dessert, even if you make your own whipping cream instead of using store-bought “whipped topping”.  I think I would do that next time since I’m not the biggest fan of the special flavor those “edible oil products” impart, although I know that would really negate the light factor. But it is dessert, after all.  And it’s gluten free, and we all know gluten is what makes us chubby anyway, right?

Right.

P.S. This would be amazing with a combo of berries too, or just raspberries. Everything is good with just raspberries.

Raspberries, raspberries, you sweet red delights

I could eat you all morning, noon, eve and night.

You’re tart and you’re sweet (I know what that’s like)

We’re two peas in a pod, we’re that much alike.

Ahem. Focus.

Strawberry Chocolate Meringue Torte 

4 large egg whites

1/4 tsp salt

1/4 tsp cream of tartar

1 cup sugar

2 cups (about 1 lb) sliced strawberries

1 tsp sugar

1/2 cup semi-sweet chocolate chips

2 cups frozen whipped topping, thawed

Directions:

Preheat oven to 250.

Cover a large baking sheet with parchment paper and draw 2 8″ circles on the paper (I trace around a cake pan or put my handily-marked silicone pie mat under the paper to trace).  Turn paper over and secure with masking tape.

Beat egg whites, salt and cream of tartar at high speed of a mixer until foamy.  Gradually add the 1 cup of sugar, a tablespoon at a time, beating until stiff peaks form.  Divide the mixture over the 2 8″ circles, spreading with the back of a spoon.  Bake for 1 – 1 1/4 hours or until meringues are crisp.  Sprinkle each meringue with 3 Tbsp chocolate chips and return to oven.  Turn off oven and let meringues stand for 5 minutes to soften chocolate.  Remove from oven and spread softened chocolate with a spatula.  Cool meringues to room temperature. Meanwhile, sprinkle strawberries with remaining 1 tsp sugar; cover and set aside.

To assemble, place 1 meringue on a serving platter, spread 1 cup whipped topping over it and top with half the strawberries.  Repeat with second meringue, second cup of whipped topping, and remaining strawberries.  Melt 1 Tbsp of chocolate chips in the microwave and drizzle over top.

Makes 8-10 servings.

Recipe barely adapted from Cooking Light magazine.

Nectarine and Cherry Cobbler

4 Aug

A couple weeks ago my lovely mother-in-law gave me a huge bowl of fresh Okanagan cherries, the best cherries around.  They needed to be used promptly due to ripeness, and thankfully this coincided with me needing to make dessert for 10ish people.

At my current rate of 5 lbs of lower-body weight gain per week, I couldn’t justify eating an entire dessert by myself this time.  Or really any dessert.  Ok, I can always justify eating some dessert, let’s be serious.  But the end of calorie-burning breastfeeding is always such a sharp reality check around here.  On the bright side though, it means back to the mall as, yet again, it seems nothing in my wardrobe fits just right.  I think Carl is starting to believe I do this on purpose, having my body change size and shape every 6 months or so, but I think men will just never understand the many stages of body shape that accompany the before-during-after-even later after of procreating.

I had seen a recipe for Peach and Cherry Skillet Cobbler on Diethood that got me thinking about that combo.  I knew my skillet wasn’t going to be big enough and the recipe looked a little time-consuming given my last-minute nature, but the combination wouldn’t get out of my head.

Being averse to peeling peaches, again due to time constraints, I went with nectarines and left the skin on – they aren’t quite as sweet and delicious as fresh peaches but I love them nonetheless.  As we all know, smooth skin makes up for a lot of other shortfalls.

I highly recommend buying a cherry pitter if you’re going to be making anything with any amount of cherries (like, more than 2), or if you have children who can’t (or won’t) spit out pits.  I had to search good and hard to find said pitter, so if you’re looking, just start in a specialty kitchen store, skip the whole Walmart or Canadian Tire route since they may have everything under the sun but they do not have cherry pitters.  Cherry pitters have come a long way from the spring-loaded contraption I remember in my mom’s kitchen – they now come equipped with comfort grips, locking mechanisms, and handy clear splash guards!  I grabbed a new pair of tongs while I was at it which is equally exciting, since using full-length barbecue tongs in a little frying pan in a narrow kitchen is more than a little awkward.

Anyways, the cobbler!

There are apparently many ways to make cobbler, and people have strong feelings about what constitutes a “true” cobbler.  This version is the type with a biscuit top, and, while I liked it, I prefer the kind that are more like a cake with fruit all throughout.  Much as I love piles of fresh fruit, I also love my carbs – the same reason I always cut back the fruit in fruit crisps and double the amount of crumble topping.  Fruit to topping ratio is very important to me.  If fruit is your favorite part of a cobbler, this will be right up your alley!  

I also used the same fruit mixture, thickened with 1 Tbsp cornstarch in place of the flour, to make a couple gluten-free crumbles to accommodate food intolerances. (In case you’re interested, my gluten-free crisp for the two individual servings was just 2 Tbsp melted butter, 1/3 cup quick oats, and 1/3 cup brown sugar).

Nectarine and Cherry Cobbler

Fruit mixture:

4 cups sliced nectarines (about 4 nectarines)

3 cups cherries, pitted and chopped

1/3 cup orange juice

2 Tbsp lemon juice

1 tsp lemon zest

1/2 cup granulated sugar

2 Tbsp flour

1 tsp vanilla

Biscuit topping:

3/4 cup all-purpose flour

1/2 cup whole wheat flour

3 Tbsp brown sugar

1 1/2 tsp baking powder

1/2 tsp salt

1 tsp lemon zest

1/4 cup cold butter, cubed

1/2 cup milk

Directions:

Preheat oven to 350.

Toss fruit mixture ingredients gently and dump into a 9×9″ or 8×11″ baking dish.  Bake for 20 minutes.  

Meanwhile, make biscuit topping. Whisk together dry ingredients, including lemon zest.  Cut in butter until crumbly.  With fork, stir in milk to make a soft, ragged dough.  Drop dough onto fruit mixture in about 9 heaping tablespoons, and sprinkle the whole top with an additional tablespoon or two of sugar.  Return to oven and bake for 45-50 minutes, until biscuits are golden and not wet underneath and fruit is bubbly.  Serve warm, ideally with ice cream 🙂


Biscuit recipe adapted from Canadian Living, fruit mixture is my own.

Hazelnut Mousse

1 Aug

I’ve been a little lax in the posting department lately since things have been busy around here!  My whole family is around since a new baby joined the family and my parents are here from Ontario and also celebrating 30 years of marriage, so we’re enjoying copious amounts of far-too-rare family time!

Naturally, this means lots of fabulous food, as I come from a family of great cooks, but far too little time spent photographing said food, or using real, shareable recipes to tell you about.  But I did recently make this mousse, which was too easy and delicious (if you like Nutella) not to share.

Also, I’m up to 94 posts now (can you believe it??) so I’m pacing myself before the 100th rolls around, since big, exciting changes are in store here at hiddenponies that I can’t wait to share with you all, and we (hint!) want to have things all lined up before the big reveal, and what better occasion than the hundredth post? Keep your eyes peeled 🙂

For now, calm your suspense and gather the whole 4 ingredients you need to whip up a batch of this light, fluffy mousse!  Carl figures he will never be able to eat Nutella on toast again after enjoying it in mousse texture. I’m not so easily thrown off my breakfast chocolate, but I do think I’ll have to make this again with plain dark chocolate spread since, good as this was, I’m not as much a Nutella fanatic as some people.  And really, dark chocolate mousse can only be an improvement on pretty much anything.

Hazelnut Mousse

1/2 cup hazelnut chocolate spread, such as nutella

2 tbsp water 

1 tbsp butter, softened

3/4 cup heavy whipping cream

12 toasted hazelnuts, halved (optional)

Directions:

In heatproof bowl over saucepan of hot (not boiling) water, melt chocolate spread with 2 tbsp water until smooth; stir in butter. Keep warm. (I’m lazy and did this step in the microwave and it made no difference).
 
In separate bowl, whip cream; fold one-third into chocolate mixture. Fold in remaining cream. Divide among four small serving bowls. Cover and refrigerate for at least 3 hours. Garnish with hazelnuts if using, or a dollop of whipped cream…or a piece of toast, and call it breakfast!
Recipe barely adapted from Canadian Living.

Nice buns ;)

7 Jul

I always have the best intentions of making my own bread and buns, but it pretty rarely turns into action.

Not having a stand mixer is a good excuse, I figure, but not good enough, I know.  There really is nothing like the sense of accomplishment when, 60 million hours after starting, you pull fresh homemade bread or buns out of the oven, with the house smelling amazing and your family left in no doubt as to your domestic prowess.

Every time I DO get around to making my own, I swear it is so easy I will never buy buns again, but you can guess what I throw in my grocery cart 4 days later. I don’t know why, but it always happens.

This recipe was another one that made me feel confident I could do this regularly (of course, I didn’t, but it’s good to have a recipe in case the mood strikes again!).

I often turn to Annie’s Eats’ Soft Garlic Knots, which are amazing and quite purty, and they come together easily and can be made with all-purpose flour, which I always have handy.  But this time I didn’t want something savory, I wanted a classic, basic dinner roll-type bun.  I also decided to give bread flour a try, and I’m glad I did.  I used 60% whole wheat bread flour, and while they didn’t rise quite as high as I anticipated, I’m sure it was due to the fact that they didn’t rise in a very warm place, and the fact that I forgot about them and probably let them over-rise before baking them, but the texture was absolutely PERFECT, and they were plenty high enough.  The bread flour really does give a lighter, more “store-bought” texture, and these buns were delicious with just plain ham and cheese, and would also make a great dinner roll.  Give ’em a try one day when you’re feeling domestic 🙂

Heavenly Yeast Rolls

Source: http://tastykitchen.com/recipes/breads/heavenly-yeast-rolls/ 

1 ½ cups warm water

1 Tbsp active dry yeast

3 Tbsp sugar

2 tsp salt

4 Tbsp butter

4 cups bread flour

Directions:

In a large mixing bowl, dissolve yeast in warm water with the sugar. Add the salt, butter, and 3 cups of the flour. Mix until smooth.  Add in enough remaining flour to make a soft dough, adding more flour if needed. Push your fingers into the dough; the dough should feel like it’s going to stick to your fingers as you pull them away, but it actually doesn’t. 

Turn onto a floured surface; knead until smooth and elastic, about 10 to 20 minutes. Place in a lightly greased bowl, turning once to grease the top. Cover and let rise in a warm place until doubled, about 1 hour.

Punch dough down. Using a 1/3 cup measuring cup, measure out the dough for 12 rolls. Shape each into a ball. You may have a little bit of dough left over, so make whatever you want with that. Place the rolls into a greased 9″x13″ pan. Cover and let rise until they are at least double in size, about 30 to 45 minutes. You can let them rise longer to get even larger rolls, but you need to watch them carefully so they don’t over-rise and then deflate when they bake. I always let them rise to their maximum capacity. 

Bake at 375 degrees for 22-28 minutes, until golden brown.  Remove from oven and brush with melted butter.

Delicious served warm, but these also freeze really well for future use.

Rosemary Garlic Roasted Beets

5 Jul

I’ve been meaning to try roasted beets for aaaages, but Carl was dragging his feet as he sometimes does in the new-veggie department so I put it off and tried to convince him to put them in his smoothies instead, which also ended unsuccessfully.  I wasn’t willing to give up, though, because they are a seriously beautiful colour and for anyone who knows me, colour goes a long way with me.  

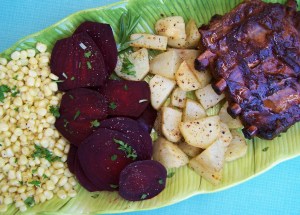
I made this dinner, which featured beets, a few nights ago, and it turns out beets don’t just turn your fingers, adjoining food and *ahem* *other things* magenta, they are surprisingly edible!

I was going to tell you all about it while watching a movie with Carl, being the multi-tasker that I am.  Did you know you can call it that now?  Not ADD, just multi-tasking.  I like it much better.

We ended up watching “127 Hours”, since Carl had read the book it’s based on and convinced me I would want to see the movie, but (SPOILER ALERT) trust me, there’s nothing like watching someone break their own arm and hack it off with a cheap utility knife to make you not feel like blogging about food.

Even writing that, I am considering not blogging about food.  Because with that mental picture you certainly don’t want to immediately look at and think about food, now do you?  It is a good movie though, don’t get me wrong.

Let’s just talk about something else first.

Let’s talk about the phenomena of renting movies on your TV.

This was actually the first time we did it, and it sure is frighteningly convenient isn’t it?  No debating who has to get off the couch to go to the movie store, either to get a movie or to return it.  No overdue fines.  The ability to watch the trailer first and determine which option has the handsomest actor with the best voice.  A slightly surprising TV bill at the end of the month.

I feel a little sorry for Blockbuster.

Are we ready to talk about beets again?

Oh, good!

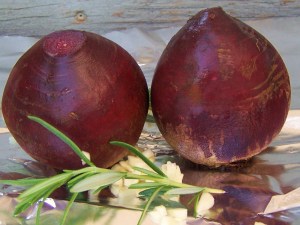
They really are a beautiful veggie.

I grew up in a home where homegrown pickled beets were always found in abundance, but since I’ve yet to find anything I like pickled, it’s no surprise I wasn’t a fan of pickled beets.

Roasting vegetables, on the other hand, really never goes wrong, and beets, it turns out, are no exception.  Just make sure you give them lots of time so they’re nice and tender, or cut them into smaller cubes prior to roasting.  This way of preparing needs a good hour or more, but the beets come out infused with a rosemary and garlic flavour that is subtly delicious, and makes your house smell aMAZing.

Rosemary Garlic Roasted Beets 

(Serves 2)

2 beets

2 cloves garlic, 1 minced and 1 left whole

2 tbsp chopped fresh rosemary

1 tbsp olive oil

1/2 tsp each salt and pepper

2 tsp minced fresh parsley and/or rosemary (to garnish)

Directions:

Preheat oven to 425 degrees.  Cut beet tops to leave 1″ attached; leave tails.  Place on 10″ square of foil and sprinkle with rosemary, minced garlic and salt and pepper. Cut top off whole garlic clove and place beside beets.  Drizzle with oil. Fold to form closed packet.  Roast on rimmed baking sheet for 1-1 1/4 hours, until fork tender.

Remove from oven and, wearing gloves, peel and trim beets and cut into 1/4″ thick slices.  Arrange on warmed platter and drizzle with a bit more olive oil and sprinkle with parsley and/or rosemary to garnish.

Recipe adapted from Canadian Living.

…Eggplant is next up – I’ve bought them a couple times but I just spend many days admiring the gorgeous exterior royalty of it all, and never want to actually cook the beautiful things!

Bacon Chicken Caesar Pasta Salad

23 Jun

With hot summer weather comes cool summer suppers!

Chicken Caesar Pasta Salad

I’ve been making this recipe for awhile after having something similar in Mitch Miller’s restaurant in Abbotsford.  I ordered a chicken caesar salad and there were NOODLES in it!  Now, if you know my feelings about pasta you know exactly how I felt about that – GIDDY would not be an overstatement.  Why had I never put pasta in my salad before?  Well, I would make up for it as expediently as possible.

I love pasta salads, Carl won’t touch them with a 10-foot pole.  Cold food makes his heart bleed. But Carl DOES love caesar salad.  And pasta.  Hmmmm.  Do you see where this is going?

YES, this is the perfect compromise for him, and it’s great for kids who aren’t big on lettuce too since there is plenty of substance with the noodles and chicken and bacon to keep them full and happy.  When I brought it to the table and sat down Gemma held up her hands and asked, “But Mom, what about the other supper?”  In other words, “Is this it?”  Obviously we usually have our salads on the side.  But she loved it!  And I just love lettuce and chicken and bacon and cheese and PASTA. I’ve also made this with leftover turkey – a great alternative to typical “leftover turkey” dishes.

If you aren’t like Carl and DO like pasta salads, this is actually a great pasta salad without the lettuce and croutons, as a Chicken Caesar Pasta Salad.  It travels great this way if you have to bring something to a party and don’t feel like bringing lettuce and croutons to add last minute, since if you add them at home you will be known as the one who brought the soggy salad and, as reputations go, yours could be better.

A pretty pasta salad already!

But if you want a full meal of deliciousness, add the lettuce and croutons and serve with a side of fresh crusty bread of some sort.  This recipes serves 2-4, depending if you have bread as well – 3 of us ate only salad and were full to the brim.  

First, one more note – you can use any kind of lettuce for this, and romaine would be the traditional caesar salad choice but I just love the fresh red leaf lettuce that’s out right now.  Isn’t it gorgeous?  Carl bought it for me 🙂  Way better than flowers that die and have to be thrown out – I am all about edible gifts.

A bouquet from my love

BACON CHICKEN CAESAR PASTA SALAD

1 cup dry pasta, cooked according to package directions (rotini or bowtie pasta holds the dressing nicely)

6 slices bacon, cooked; reserve 1 Tbsp bacon drippings to toss with pasta

1 cup cooked chicken, chopped

1/3 cup grated Parmesan cheese

1/4 cup thinly sliced red onion

1/4-1/2 cup chopped fresh parsley (optional – definitely use it if you’re making it as a pasta salad)

1/2 a large head of lettuce

Croutons

Caesar dressing (I really think Renee’s Caesar dressing is the best there is, you can find it in the refrigerated section of the grocery store, usually near the lettuce)

Fresh black pepper

Directions:

Cook pasta according to package directions.  Meanwhile, cook bacon and prep all other ingredients.  

Drain pasta and rinse under cold water.  Transfer to bowl and toss with 1 tbsp bacon drippings (doesn’t “drippings” sound so much better than “grease”?  But really, this is important to get the best flavour, don’t skip it!  If you’re making this ahead, it also keeps the pasta from sticking together.)

Combine all ingredients in a large bowl and toss to coat thoroughly with dressing.  Serve immediately.

Mmmm.

*If you’re not serving it immediately, toss all ingredients EXCEPT lettuce and croutons together and store in the fridge.  When ready to serve, add lettuce and croutons and additional dressing and black pepper.

And I just had to share a picture of my mini-me – she always makes “dinner” in her own kitchen while I cook, and invariably makes the same thing I am making, so today she had a big salad.  When I went to take a picture of mine she didn’t want her work of art to be left out, so she grabbed her own “camera” (a block) and followed me outside.  When I exclaimed, “Oh, I forgot the croutons!” she clapped her hands to her cheeks and shouted “Me too!” and we both hurried inside to remedy the situation.  She cracks me up every day.

A food blogger in the making

Hers looks delicious too!

Frozen Raspberry Cheesecake

10 Jun

This is one of my favourite recipes for a fresh, light dessert after a heavy dinner of something like burgers or steak. It’s so easy and can be made WAAAAAAY ahead so you don’t have to do any dessert prep on the actual day of your gathering!  It’s also a handy one to have on hand in case of unexpected guests, and if they don’t come you can eat it bit by bit and freeze the part you aren’t eating so there’s no pressure to eat a whole cake between the two of you before it gets stale – a pressure the two of us around here take very seriously.  If you have a bigger family, ignore that dilemma 🙂

The recipe came to me from the wife of my boss when I was managing a Benjamin Moore store after we enjoyed it at a barbecue at her house one day, and I was amazed (and happy) to find out how easy it was!  Since it doesn’t actually take fresh raspberries it can be made anytime of year.   I would say it tastes more like a sherbet or gelato cake than a cheesecake, since the raspberry flavour is really dominant and the frozen texture is so creamy and fresh, and my non-cream-cheese-eating hubby loves this so the flavour can’t be too strong.

Light and simple for summer

Frozen Raspberry Cheesecake

Crust:

1 cup chocolate cookie crumbs

2 tbsp butter, melted

Combine and press into bottom of a 9″ springform pan. Freeze for 15 minutes, or whatever time it takes you to get the rest ready. (This can also be made in a 9×13″ pan if you want squares, or can be made entirely crustless to be gluten free, and still delicious!)

Filling:

1-250g pkg cream cheese, softened

1 can raspberry juice concentrate, thawed

2 tbsp icing sugar

1 L Cool Whip, thawed

 Directions:

Blend cream cheese until very smooth. Gradually add raspberry juice and icing sugar, beating until smooth. Fold in Cool Whip.  Pour onto crust. Cover and freeze at least 4 hours, or overnight.

Enjoy!

A little more decadent for Christmas

Meatball Slubs

7 Jun

I wasn’t sure what to call these, since in my mind they had to be called “slubs” but I realize that doesn’t really sound too appetizing.  But that’s just what they are – slider hot dog buns filled with meatballs = slider subs = slubs.

Amiright?

Superstore started selling these eensy top-split hot dog buns, presumably to complement their eensy slider hamburger buns, and since hot dogs are one food I generally won’t touch I had to think of something else to do with the cute li’l fellas, especially when I spotted a bag on the 50% off stand just asking to enter my buggy.

I love cute little food things, with the exception of the mini-corns in Chinese food, since I’m never quite confident that they are actually intended for eating and not just decorative filler, like straw in a gift basket of foodstuffs.  

These are right up Carl’s food-alley:  toast the buns in the oven for 5 minutes to eliminate sogginess, stuff in 2-3 small meatballs, top with tomato sauce and cheese (I’m addicted to Monterey Jack) and toss ’em back in the oven for 5 more minutes.

Once I got started I figured I might as well make the whole bag, so I could test if leftovers were reheatable in the oven, but I never got to find out – between the 2 1/2 of us we ate the whole dozen.  A side salad would’ve been nice too if I wasn’t making a whole bag of buns.

So easy, so delicious, and a great way to use my herb garden by making a sauce chock full of fresh basil and oregano!  

Fresh Fish

2 Jun

There are few foods better than fresh, grilled fish.

Just look at that beautiful wild salmon.  My walls are kind of this colour; it’s one of my favourites.

I like the flavour of the fish to shine, so I just add some lemon slices, a couple cloves of garlic to roast nearby and give a subtle flavour, a good sprinkle of salt and pepper and some butter.  You could do a piece this size with half the butter, but I don’t know why you would 😉  Just put it on foil, top with another piece of foil the same size, seal the edges and throw on the grill for 15-20 minutes, until fish flakes easily with a fork.  All those flavours will steam together while the salmon cooks in the butter and it’s own juices…yum.

The only problem with salmon is the cost, especially since Gemma absolutely loves it and could eat this whole piece herself if we let her!  But I justify the cost with good-for-the-brain arguments; brain health is worth any cost I figure.

I just serve a couple filling sides to make up for the small amount of beautiful fish…I went with Roasted Lemon Broccoli with Parmesan cheese and Rosemary Roasted Potatoes/Sweet Potatoes.


Sometimes the most delicious food really is the most simple and natural.

Creamy Chicken Taquitos

31 May

I love finding recipes that are easy and delicious enough to be make-againable.  This is definitely one that will be joining my regular rotation and probably becoming one of my go-to recipes when I need to bring someone a freezer meal!  The recipe doubles easily, and you can cook the taquitos from frozen in about 25 minutes.  They taste just like those taquitos you buy in a box for $10 or something equally ridiculous, and these don’t have your entire day’s sodium content in two little rolls.

After making them, a couple people randomly mentioned they had made the same thing that week so I clearly wasn’t the only one who thought these looked good!

I’ve made these a couple times now and the filling ingredients are super flexible, another feature of a great recipe for those of us whose grocery list is sometimes less than perfectly planned.  Adjust the spices to your taste and the number of kids eating with you – Gemma is not a fan of spice so I take out some of the mixture before throwing in the jalapeno and chili powder.

Also, I liked them with regular cream cheese but Carl and my mother-in-law are strongly anti-cream cheese so when I made this for them I substituted a combination of vegetable cream cheese spread and ranch dressing (this blog makes me give away all my secrets, after swearing to them both there was no cream cheese present 😉 ).  I have found in general that the flavoured cream cheese spreads, especially vegetable or herb and garlic flavour, give the same creaminess I’m looking for but don’t have that distinct “cream cheese” taste and they have saved me many a time.  Just don’t try this trick on your next cheesecake.

And make sure you line your baking sheet with foil or parchment paper since there is cheesy spillage and that stuff is a you-know-what to clean off.

CREAMY CHICKEN TAQUITOS

3 oz cream cheese, softened (or substitute Ranch dressing)

1/4 cup salsa

1 tbsp fresh lemon or lime juice

1 tsp chili powder

1/2 tsp cumin (this is what really makes them taste like the store-bought taquitos!)

1/2 tsp onion powder

2 cloves garlic, minced or finely grated

3 tbsp chopped parsley

2 green onions, chopped

1 jalapeno, seeded and chopped

1/2 cup chopped red or yellow pepper

2 cups cooked chicken, shredded or finely diced

1 1/2 cups shredded cheddar or Monterey Jack cheese

12 6″ flour tortillas

Cooking spray

DIRECTIONS:

Preheat oven to 425.

In large bowl, combine all ingredients except tortillas and cooking spray, mixing until very well combined.          Microwave tortillas for 20 seconds to make rolling easier, then spoon 2 heaping tablespoons of filling down the middle  of each tortilla.  Roll tortillas up tightly and place seam-side down on a foil-lined baking sheet.  Spray the tops lightly with cooking spray (this helps them brown and crisp).  At this point, you could freeze the taquitos and cook from frozen another day, or bake for 15-20 minutes until crisp and golden brown.  Serve with sour cream.

Recipe adapted from Annie’s Eats.