Tag Archives: recipe

Saturday Sweets: Chocolate Soufflés

13 Aug

Happy Saturday!

Welcome to the 99th post, the one before the much anticipated 100th post!! Oh boy, I can hardly wait 🙂

Over here the sun is shining, the kids are finally healthy again, the airplanes are rattling the roof thanks to the nearby Airshow, and we’re about to get another look at our new house to take some measurements so I can start planning how to maximize work space and functionality in my new (still fairly small) kitchen!  A good day all ’round, and made even better by these chocolate soufflés.

I made these as part of  the blitz when my family was here, yet another delicious gluten-free dessert to add to the repertoire. This recipe came to me via my friend Kate, who is an amazing cook.  She made these with a delicious coconut cream topping for a Mexican-themed dinner night, after which I could not stop thinking about them and had to have the recipe.  Thanks for sharing Kate!

Unfortunately, I didn’t get a great picture to show you since it was later in the evening when I made them and I was barely containing my desire to delve in long enough for one quick picture, let alone a variety.  I do apologize.

If you’ve been intimidated by soufflés (which I was), it’s time to take the plunge.  This recipe takes a few steps and a few bowls, but it is SO WORTH IT.  They can also be prepped ahead, refrigerated, and thrown in the oven when your guests are over so it will look really effortless 🙂  This is one of the chocolatey-est, richest, most decadent things you could imagine, but somehow totally avoids being overly sweet or cloying.  This is something you would order in a restaurant to share and then regret the fact that you hadn’t ordered two. If you eat it immediately out of the oven it will have a soft mousse texture throughout, and if you let it sit 10-20 minutes to cool it will set a bit more and just have a gooey, mousse-like centre. Either way, amazing.

This recipe makes 8, but it could easily be halved. Either way, this was one of the best things I’d ever eaten and I was so glad I was able to reproduce it with much less stress than I thought a soufflé would bring! Try ’em soon.

Chocolate Soufflés


(Gluten-free) 

1/2 cup butter
8 oz semi sweet chocolate (8 squares)
3 whole eggs plus 4 egg whites
1 cup sugar
1 tsp vanilla

Grease 8 custard cups with some melted butter, stroking upwards with pastry brush to help soufflés rise high. Then coat with thin layer of sugar. Set in freezer to cool.

In a bowl over a saucepan of hot water, melt chocolate with 1/2 cup butter. Remove from the heat.

In separate bowl, beat whole eggs with 1/2 cup sugar. Whisk slowly into chocolate and add vanilla.

In another bowl, beat egg whites. Add remaining 1/2 cup of sugar, 2 tbsp at a time, until stiff peaks form.  Fold slowly and gently into chocolate mix.

Spoon into custard cups (I used ramekins and only filled them half full so the soufflés rose only just above the high edges of the dish, which looked a little less impressive than in low custard cups where they can rise way above the dish, but the taste was the same :)). Level them off and make sure rims are clean. Bake at 350 degrees for 25-28 min. DO NOT open oven while baking or the soufflés will fall!

You can make them ahead and refrigerate for up to 2 days if they are covered, then bake when needed. 

Thanks again for the recipe, Kate!


Hazelnut Mousse

1 Aug

I’ve been a little lax in the posting department lately since things have been busy around here!  My whole family is around since a new baby joined the family and my parents are here from Ontario and also celebrating 30 years of marriage, so we’re enjoying copious amounts of far-too-rare family time!

Naturally, this means lots of fabulous food, as I come from a family of great cooks, but far too little time spent photographing said food, or using real, shareable recipes to tell you about.  But I did recently make this mousse, which was too easy and delicious (if you like Nutella) not to share.

Also, I’m up to 94 posts now (can you believe it??) so I’m pacing myself before the 100th rolls around, since big, exciting changes are in store here at hiddenponies that I can’t wait to share with you all, and we (hint!) want to have things all lined up before the big reveal, and what better occasion than the hundredth post? Keep your eyes peeled 🙂

For now, calm your suspense and gather the whole 4 ingredients you need to whip up a batch of this light, fluffy mousse!  Carl figures he will never be able to eat Nutella on toast again after enjoying it in mousse texture. I’m not so easily thrown off my breakfast chocolate, but I do think I’ll have to make this again with plain dark chocolate spread since, good as this was, I’m not as much a Nutella fanatic as some people.  And really, dark chocolate mousse can only be an improvement on pretty much anything.

Hazelnut Mousse

1/2 cup hazelnut chocolate spread, such as nutella

2 tbsp water 

1 tbsp butter, softened

3/4 cup heavy whipping cream

12 toasted hazelnuts, halved (optional)

Directions:

In heatproof bowl over saucepan of hot (not boiling) water, melt chocolate spread with 2 tbsp water until smooth; stir in butter. Keep warm. (I’m lazy and did this step in the microwave and it made no difference).
 
In separate bowl, whip cream; fold one-third into chocolate mixture. Fold in remaining cream. Divide among four small serving bowls. Cover and refrigerate for at least 3 hours. Garnish with hazelnuts if using, or a dollop of whipped cream…or a piece of toast, and call it breakfast!
Recipe barely adapted from Canadian Living.

Lemon Rhubarb Streusel Scones

22 Jul

Yumyumyum. This was one of the best ideas I’ve ever had.  I threw together a variety of recipe ideas/measurements/ oven temperatures with a few ideas of my own based on what was in the fridge and hoped for the best. I should really do that more often if it’s going to work out like this.  Of course, I know it can’t always work out as beautifully as this, so I should really quit while I’m ahead.  Because I feel very, very much ahead after this.

All I knew going in was that I wanted a sweet scone with a streusel topping since I love streusel toppings almost as much as I love my children.  And I had rhubarb in my fridge that needed using.  And on the back of that wildly delicious Raspberry Lemon Cake I couldn’t wait to use some more lemon zest.  

These would be so perfect with tea or coffee, if you’re into that kind of thing, and they make a perfect breakfast, lunch, or snack.  They are low fat and low sugar and still deliciously sweet and soft with a perfect crunch in the topping, which is then further topped with a little icing glaze.  To top all that off, they’re super easy and can be made with whatever fruit you have in the house!  Blueberries or strawberries would be fantastic with the lemon zest, but really, so would cranberries, or raspberries, or even dried fruit!  I love flexible recipes. And I love these scones.

Carl, after being talked into trying one, declared them a “flavour sensation” and considered them worthy of afternoon tea and evening snacking, a category usually reserved for ice cream and chocolate.  These are one of those recipes I’ll be making again as soon as I run out, and possibly before.  While I don’t munch rhubarb stalks like celery the way my mom does, I sure am enjoying experimenting with it this summer and can’t wait ’til Sunday now that I know even more fresh rhubarb is finding it’s way into my church mailbox – you know who you are, lovely rhubarb gifter, and you are awesome!!  Maybe some scones will have to find their way into your mailbox 😉

Lemon Rhubarb Streusel Scones

Scones:

1 1/2 cups all purpose flour

1/2 cup whole wheat flour (or all purpose)

4 Tbsp brown sugar

2 tsp baking powder

1/2 tsp baking soda

1/2 tsp salt

1/4 cup cold butter or margarine, cubed

1 cup chopped rhubarb

1 tsp lemon zest

1 cup (250 mL) low-fat sour cream

1 beaten egg yolk

Streusel:

1/4 cup quick cooking oats

1/4 cup packed brown sugar

1 Tbsp butter or margarine, melted

1 Tbsp all purpose flour

Glaze:

1/2 cup icing sugar

1/4 tsp vanilla

2 tsp milk

Directions:

Preheat oven to 425 degrees.

For scones, in large mixing bowl, stir together flour, brown sugar, baking powder, baking soda and salt. Cut in butter (with pastry blender or your hands) until mixture resembles coarse crumbs.  Toss rhubarb and lemon zest with flour mixture.

Whisk together egg yolk and sour cream, make a well in the center of dry ingredients and add sour cream and egg all at once.  Stir with a fork until combined (dough may seem dry).  Turn onto a lightly floured surface and knead gently about 10 times, until fairly smooth.  Pat dough into a 9″ circle and transfer to parchment paper-lined baking sheet.

For streusel, combine all ingredients.  Gently pat streusel into surface of dough and cut circle into 12 wedges.  Do not separate the wedges.  Bake for 20-25 minutes, until cooked through and topping is lightly browned and crisp.

For glaze, combine all ingredients and drizzle over scones.

Unbaked scones (above): score into wedges but do not separate.  After baking (below), let scones cool slightly before drizzling with glaze and cutting into wedges.

Store scones in airtight container for 2-3 days at room temperature or in the fridge.  For best storage, freeze scones and reheat individually for 30 seconds for a fresh-tasting treat anytime.                                                                                                                                                                                                                                                                                                                                                                          Scone recipe adapted mainly from Canadian Living, streusel recipe from an old Cooking Light magazine.

Raspberry Lemon Layer Cake

19 Jul

Raspberry and lemon has to be one of the best combinations out there, and this cake is no exception.  

Every now and then I see something or think of something  that I just know will be perfect and delicious and exactly what I feel like eating when the moment arrives to eat it.  This was definitely one of those times and this cake is firmly filed under “make again, and make often“.  I highly recommend giving it a try while all those gorgeous fresh raspberries are still around!  I only wish I had gotten a better picture of the whole cake, but it was raining and dark when it was done and I couldn’t wait to cut into it – my guests may have mutinied, and mutinous parents are bad news for bloggers. 

And, which is unlike me and is taking great restraint for my rambly nature, we’re going straight to the recipe, because this cake is really so good I don’t want to distract you with anything else that might slow your immediate run to your kitchen or grocery list to get this cake into production.

Raspberry Lemon Layer Cake

CAKE:

1/2 cup butter or margarine, softened

1 cup sugar

2 eggs

1/2 tsp each vanilla and coconut extract (almond extract would also be delicious if you don’t have coconut)

Zest of 1/2 a lemon

1 1/4 cups plus 2 Tbsp all-purpose flour

1 tsp baking powder

1/4 tsp baking soda

1/4 tsp salt

1/2 cup milk 

FROSTING:

2 oz cream cheese, room temperature

1/2 cup heavy whipping cream

1 cup icing sugar

Zest of 1/2 a lemon

1/2 tsp vanilla OR coconut extract (use coconut if garnishing with coconut, otherwise stick with vanilla)

GARNISH:

Lots of fresh raspberries! I used about 2 pints.

Optional: additional lemon zest and/or plain sweetened shredded coconut or lightly toasted coconut

Directions:

Preheat oven to 350 degrees.

Cut a circle out of parchment paper to line the bottom of an 8″ or 9″ round cake pan.  Lightly grease pan, set parchment paper in bottom and set aside.

In large bowl, beat butter and sugar until light and fluffy.  Add eggs, extracts and lemon zest and mix well. Alternate mixing in flour and milk, making two additions of each.  Beat until smooth, then pour into prepared pan and smooth top. Bake 30-35 minutes, until toothpick inserted in center comes out clean.  Cool 10 minutes before removing from pan, then let cool completely on rack before frosting.

For frosting, beat cream cheese until smooth.  Slowly add whipping cream while mixing and mix well to eliminate lumps. Add all remaining ingredients and mix until smooth.  When smooth, turn mixer to high and whip for 2-3 minutes, until fluffy and light, like a thick whipped cream.  

Slice cake horizontally in half and spread half the frosting on the bottom layer (I’m terrible at cutting things horizontally anywhere near the center, as you can see in the picture. I’ve pretty much given up buying unsliced bagels for the same reason.)  Set top layer on bottom and cover with remaining frosting, making it heavier in the center as the raspberries will push it further to the edge.  Top frosting with a pile of fresh raspberries, and garnish with additional lemon zest and/or coconut, if desired.

Yum, yum, yum.  Moist, fresh cake, tart, sweet frosting and one of nature’s miracles: razzzzzberries.  Downright zingy.

Recipe adapted from Lauren’s Latest, where you can also find fabulous pictures and a beautiful story!

Saturday Sweets: Chewy Gooey Granola Bars

16 Jul

Granola bars that aren’t really all that healthy are one of my favourite things.  In highschool I ate so many chocolate-covered granola bars that I started having a Pavlovian-type response to the end-of-day bell; it rang, I craved a chocolate granola bar. There is something so wonderfully sneaky about those chocolate-covered granola bars: because you know there are oats in there, you can completely avoid the guilt that comes with chowing down on a regular old chocolate bar.

This homemade version is kind of like that – it has a lot of healthy stuff involved, but also a fair share of unhealthy ingredients.  Good thing all the healthy things remove any potential guilt, not to mention the fact that homemade is BOUND to be healthier because you aren’t using chemicals (right?).

Pop quiz: What is gooey and chewy and deliciously salty-sweet and still totally healthy?

Answer: Nothing.

I know, some of you were thinking fresh caramel corn, and I hate to be the bearer of bad news, but just because it is popcorn based and popcorn is low-fat, caramel corn is not healthy.

But these granola bars are DEFINITELY worth making, totally healthy or not!  They are not the kind of granola bar you want to take hiking, because their chewy gooey-ness makes them slightly fall-apart-y.  Clearly this is a post full of my best vocabulary.  It’s hard to find words to properly describe the sweet, salty, chewy, oat-y goodness of these bars – I suppose that’s why I never made it as a food critic.

I’ve made these with any number of ingredient combinations depending what’s around, and they always turn out delicious, so feel free to throw in your favourite dried fruit, nuts and seeds to up the health factor even more, but don’t skip that corn syrup even if it is the devil in liquid sugar disguise.  It is yuummmmmmmy, and makes everything stick together, and since we all know cooked honey is more than kinda awful, don’t even think about substituting it – if you’re using honey, make a different recipe 😉

If you need them gluten free, just make sure you have gluten-free oats and don’t throw in the wheat germ.  Obv 🙂

Chewy Gooey Peanut Butter Granola Bars

1 cup brown sugar, packed

⅔ cup peanut butter

½ cup corn syrup

½ cup butter or margarine, melted

2 tsp vanilla

3 cups quick cooking oats

⅓ cup wheat germ or ground flax seed

Options (Use all, some or none):

2 tbsp sesame seeds or sunflower seeds

2 tbsp chia seeds

1 cup chocolate chips

½ cup raisins or dried cranberries

½ cup coconut

½ cup chopped nuts

Directions:

Preheat oven to 350 degrees.

In large bowl, combine brown sugar, peanut butter, corn syrup, butter and vanilla.  Stir in oats and wheat germ.  Fold in any other options you have chosen.  Press evenly into lightly greased 9×13” pan.  Bake for 18-20 minutes or until light brown, but still gooey-chewy looking.  Cool completely before cutting into bars or squares.

When life gives you lemons, make Lemon Bars

13 Jul

I thought we could all use a bit of a break from peanut butter, and the freshness of lemon is the perfect antidote to an overdose of rich, peanut butter chocolate treats.

But, I made some peanut butter granola bars today that will be making an appearance soon…and I have enough of that never-ending tub of expiring peanut butter for at least another recipe or two, so we’re not out of the woods yet.

For now, let’s focus on lemon freshness, and not the cleaning kind – I think my cleaning prowess was called into question today when I had this conversation with my 3-year-old:

Me: Time to clean up the toys.

G: Whhhyyyyyyy?

Me: I have to vacuum.

G: Who’s coming over?

Hmmm. 

I’d rather make my house smell like lemons in other ways.

Lemon bar ways.

Don’t make these unless you have fresh lemons – when you use 1/2 a cup of lemon juice, you will definitely notice if the lemon juice is not up to par.

So get fresh lemons (about 4) and make these. They’re a perfect combination of shortbread-y crust in equal amount with tart, creamy lemon. Perfect with tea, if you’re into that kind of thing. My mom is, and it’s her recipe, so I should mention the tea.  And thanks for letting me scam your recipes Mom, even if they do have pretty boring names 🙂

LEMON BARS

Crust:                                                                                                           

1 cup flour                                                                                                      

1/4 cup sugar                                                                                               

1/2 cup butter or margarine                                                                   

Topping:                                                                                                                    

1 cup sugar   

3 Tbsp flour

3 eggs

1 1/2 tsp grated lemon zest (1 lemon)                            

1/2 cup fresh lemon juice

Directions:

Preheat oven to 350 degrees.

For crust, combine flour and sugar, then cut in butter until mixture resembles coarse crumbs.  Press mixture into lightly greased 8″ square baking dish.  Bake for 15-20 minutes, until very light golden.

For topping, whisk sugar, flour, eggs and lemon zest in a small bowl just until smooth.  Pour over warm crust.  Bake 25-30 minutes longer, or until set.  Cool completely in pan on rack before cutting into bars.  

These taste delicious room temperature or chilled…if your kitchen is as warm as mine, I’d recommend keeping them in the fridge.

Enjoy!

Saturday Sweets: Peanut Butter Chocolate Chip Cookies

9 Jul

Can you believe it?  Yet another peanut butter cookie recipe!  You may recall my warning about the 2 kg tub of peanut butter needing to be used – sometimes I hyperbolize, but this wasn’t one of those times.

These are the oldest recipe I know for peanut butter cookies, as my mom has been making them for as long as I can remember.  They never fail to disappear quickly, and they are probably also my most forgiving cookie recipe.  When we lived in our tiny apartment in Ottawa and the kitchen was also 32,000 degrees these were the only cookies that turned out fine without refrigerating the dough first.  They freeze and thaw amazingly, and they travel really well – you can pull a mushed cookie out of your backpack a week after making them and it will STILL be soft and chewy and delicious.

To me this is the classic peanut butter cookie, even if it doesn’t have fork prints on top.  I remember from when I was a kid and a teenager hearing people ask my mom for this recipe, and since she was willing to share it with them I feel she will be proud to have it passed on to many more.  These are really JUST as good as the Peanut Butter Oatmeal Chocolate Chip cookies I rave about, and feel a little more indulgent since you can’t talk up the oatmeal component.  I recommend trying them as soon as you get your hands on the necessary ingredients.  And I highly recommend doubling the recipe.

Peanut Butter Chocolate Chip Cookies

1/2 cup butter or margarine

1/2 smooth peanut butter

1/2 cup granulated sugar

1/2 cup brown sugar

1 egg

1/2 tsp vanilla

1 1/4 cups all-purpose flour

3/4 tsp baking soda

1/4 tsp salt

1/2 cup chocolate chips

Directions:

Preheat oven to 375 degrees.

Cream butter, peanut butter, sugars, egg and vanilla.  Stir together dry ingredients, then blend into creamed mixture.  Stir in chocolate chips.

Spoon onto ungreased cookie sheet and bake for 9-11 minutes, until just set; these aren’t the same even slightly overdone. Cool slightly before removing to racks to cool completely.

And just for fun, for those of you who’ve seen my kitchen in all it’s windowless glory, I thought I’d take a picture that let you see where I actually photograph the food you see…the photographs are nothing to write home about, I know, but natural light is all my little camera really likes, so my food and I go outside 🙂

Quite scenic early morning light, isn’t it?

Enjoy!

Nice buns ;)

7 Jul

I always have the best intentions of making my own bread and buns, but it pretty rarely turns into action.

Not having a stand mixer is a good excuse, I figure, but not good enough, I know.  There really is nothing like the sense of accomplishment when, 60 million hours after starting, you pull fresh homemade bread or buns out of the oven, with the house smelling amazing and your family left in no doubt as to your domestic prowess.

Every time I DO get around to making my own, I swear it is so easy I will never buy buns again, but you can guess what I throw in my grocery cart 4 days later. I don’t know why, but it always happens.

This recipe was another one that made me feel confident I could do this regularly (of course, I didn’t, but it’s good to have a recipe in case the mood strikes again!).

I often turn to Annie’s Eats’ Soft Garlic Knots, which are amazing and quite purty, and they come together easily and can be made with all-purpose flour, which I always have handy.  But this time I didn’t want something savory, I wanted a classic, basic dinner roll-type bun.  I also decided to give bread flour a try, and I’m glad I did.  I used 60% whole wheat bread flour, and while they didn’t rise quite as high as I anticipated, I’m sure it was due to the fact that they didn’t rise in a very warm place, and the fact that I forgot about them and probably let them over-rise before baking them, but the texture was absolutely PERFECT, and they were plenty high enough.  The bread flour really does give a lighter, more “store-bought” texture, and these buns were delicious with just plain ham and cheese, and would also make a great dinner roll.  Give ’em a try one day when you’re feeling domestic 🙂

Heavenly Yeast Rolls

Source: http://tastykitchen.com/recipes/breads/heavenly-yeast-rolls/ 

1 ½ cups warm water

1 Tbsp active dry yeast

3 Tbsp sugar

2 tsp salt

4 Tbsp butter

4 cups bread flour

Directions:

In a large mixing bowl, dissolve yeast in warm water with the sugar. Add the salt, butter, and 3 cups of the flour. Mix until smooth.  Add in enough remaining flour to make a soft dough, adding more flour if needed. Push your fingers into the dough; the dough should feel like it’s going to stick to your fingers as you pull them away, but it actually doesn’t. 

Turn onto a floured surface; knead until smooth and elastic, about 10 to 20 minutes. Place in a lightly greased bowl, turning once to grease the top. Cover and let rise in a warm place until doubled, about 1 hour.

Punch dough down. Using a 1/3 cup measuring cup, measure out the dough for 12 rolls. Shape each into a ball. You may have a little bit of dough left over, so make whatever you want with that. Place the rolls into a greased 9″x13″ pan. Cover and let rise until they are at least double in size, about 30 to 45 minutes. You can let them rise longer to get even larger rolls, but you need to watch them carefully so they don’t over-rise and then deflate when they bake. I always let them rise to their maximum capacity. 

Bake at 375 degrees for 22-28 minutes, until golden brown.  Remove from oven and brush with melted butter.

Delicious served warm, but these also freeze really well for future use.

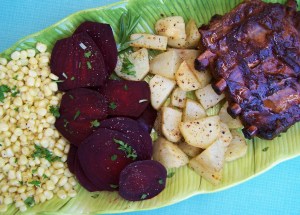
Rosemary Garlic Roasted Beets

5 Jul

I’ve been meaning to try roasted beets for aaaages, but Carl was dragging his feet as he sometimes does in the new-veggie department so I put it off and tried to convince him to put them in his smoothies instead, which also ended unsuccessfully.  I wasn’t willing to give up, though, because they are a seriously beautiful colour and for anyone who knows me, colour goes a long way with me.  

I made this dinner, which featured beets, a few nights ago, and it turns out beets don’t just turn your fingers, adjoining food and *ahem* *other things* magenta, they are surprisingly edible!

I was going to tell you all about it while watching a movie with Carl, being the multi-tasker that I am.  Did you know you can call it that now?  Not ADD, just multi-tasking.  I like it much better.

We ended up watching “127 Hours”, since Carl had read the book it’s based on and convinced me I would want to see the movie, but (SPOILER ALERT) trust me, there’s nothing like watching someone break their own arm and hack it off with a cheap utility knife to make you not feel like blogging about food.

Even writing that, I am considering not blogging about food.  Because with that mental picture you certainly don’t want to immediately look at and think about food, now do you?  It is a good movie though, don’t get me wrong.

Let’s just talk about something else first.

Let’s talk about the phenomena of renting movies on your TV.

This was actually the first time we did it, and it sure is frighteningly convenient isn’t it?  No debating who has to get off the couch to go to the movie store, either to get a movie or to return it.  No overdue fines.  The ability to watch the trailer first and determine which option has the handsomest actor with the best voice.  A slightly surprising TV bill at the end of the month.

I feel a little sorry for Blockbuster.

Are we ready to talk about beets again?

Oh, good!

They really are a beautiful veggie.

I grew up in a home where homegrown pickled beets were always found in abundance, but since I’ve yet to find anything I like pickled, it’s no surprise I wasn’t a fan of pickled beets.

Roasting vegetables, on the other hand, really never goes wrong, and beets, it turns out, are no exception.  Just make sure you give them lots of time so they’re nice and tender, or cut them into smaller cubes prior to roasting.  This way of preparing needs a good hour or more, but the beets come out infused with a rosemary and garlic flavour that is subtly delicious, and makes your house smell aMAZing.

Rosemary Garlic Roasted Beets 

(Serves 2)

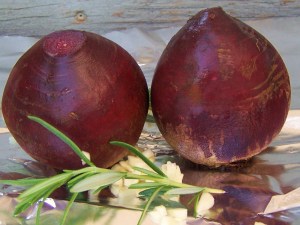
2 beets

2 cloves garlic, 1 minced and 1 left whole

2 tbsp chopped fresh rosemary

1 tbsp olive oil

1/2 tsp each salt and pepper

2 tsp minced fresh parsley and/or rosemary (to garnish)

Directions:

Preheat oven to 425 degrees.  Cut beet tops to leave 1″ attached; leave tails.  Place on 10″ square of foil and sprinkle with rosemary, minced garlic and salt and pepper. Cut top off whole garlic clove and place beside beets.  Drizzle with oil. Fold to form closed packet.  Roast on rimmed baking sheet for 1-1 1/4 hours, until fork tender.

Remove from oven and, wearing gloves, peel and trim beets and cut into 1/4″ thick slices.  Arrange on warmed platter and drizzle with a bit more olive oil and sprinkle with parsley and/or rosemary to garnish.

Recipe adapted from Canadian Living.

…Eggplant is next up – I’ve bought them a couple times but I just spend many days admiring the gorgeous exterior royalty of it all, and never want to actually cook the beautiful things!

Saturday Sweets: Flourless Peanut Butter Oatmeal Cookies

2 Jul

Well, I told you I would make some more cookies so then I had to!  After going to the beach, of course – first beach trip of the season! K-fer got his first mouthful of gravelly sand, and badly wanted to go back for more…I think I’m going to be one of “those” who carts along a pack and play on the next trip 🙂

These flourless cookies started as an experiment since I wanted a filling, nutritious snack to bring to my gluten intolerant sister who just had a baby and shouldn’t have to worry about making her own snacks for quite awhile.  I didn’t have any fancy gluten free flours though, so it had to be completely flourless, which I was skeptical about, both in terms of texture and taste.

Turns out I needn’t have worried!  These hold together nicely, stay chewy the way I like, and actually taste just like a peanut butter oatmeal chocolate chip cookie should taste, so even if you don’t have to avoid flour they’re worth a try, and it doesn’t get much easier than one bowl, with all the ingredients thrown together at once!  …Although they still aren’t quite as good as my favourite Peanut Butter Oatmeal Chocolate Chip cookies.  If you need them gluten free, just double check your oats and make sure they’re gluten free…I know the No Name brand say they may contain wheat, but you can get some that list ONLY oats in the ingredients (like Quaker brand) or are actually certified gluten free.

Aren’t the polka dots cute?  I want a dress like this.  I actually have one, but wore it too many times pregnant and it no longer fits nicely non-pregnant; who woulda thought, right?

But I digress.  I always seem to do this thing where I buy peanut butter on sale like a crazy person since it is one thing I’m picky about buying brand name, and end up with several kilograms needing to be used up and going crazy on peanut butter baking, so I’m happy to have one more peanut butter recipe in the repertoire.

Thanks to our new little deep freezer we don’t have to eat all this peanut butter goodness as quickly as usual, but be forewarned, there may be a bit of peanut butter trend in upcoming recipes.  Also, because I like to throw chia seeds in all kinds of things, I added 2 tbsp to these for myself, so feel free to do the same or don’t be crazy like me, all “I can make these cookies healthy” and such.  Or DO be crazy like that but add ground flax seed.  Or spinach.  No, that would be too crazy, don’t do that.  Maybe peanuts?

Flourless Peanut Butter Oatmeal Chocolate Chip Cookies

2 1/2 cups oats

1/4 cup brown sugar

1/4 cup white sugar

1/2 cup peanut butter

1/3 cup coconut

1 tsp baking powder

2 eggs

4 tbsp butter, softened

1 tsp vanilla

1/2 cup chocolate chips

Directions:

Preheat oven to 350 degrees.  Combine all ingredients except chocolate chips and blend thoroughly.  Stir in chocolate chips.  Drop onto baking sheet about 1″ apart (they don’t spread much while baking), and bake 12-15 minutes.  Let sit on cookie sheet for a couple minutes before transferring to racks to cool completely.  Makes about 2 dozen cookies.

Recipe loosely adapted from Carrots ‘n’ Cake.